In this instalment of our ongoing series around making the most of your at-home video setup, we’re going to focus on one of the most important, but least well understood or implemented parts of the equation: Lighting. While it isn’t actually something that requires a lot of training, expertise or even equipment to get right, it’s probably the number one culprit for subpar video quality on most conference calls – and it can mean the difference between looking like someone who knows what they talk about, and someone who might not inspire too much confidence on seminars, speaking gigs and remote broadcast appearances.
Basics
You can make a very big improvement in your lighting with just a little work, and without spending any money. The secret is all in being aware of your surroundings and optimizing your camera placement relative to any light sources that might be present. Consider not only any ceiling lights or lamps in your room, but also natural light sources like windows.
Ideally, you should position yourself so that the source of brightest light is positioned behind your camera (and above it, if possible). You should also make sure that there aren’t any strong competing light sources behind you that might blow out the image. If you have a large window and it’s daytime, face the window with your back to a wall, for instance. And if you have a moveable light or a overhead lamp, either move it so it’s behind and above your computer facing you, or move yourself if possible to achieve the same effect with a fixed position light fixture, like a ceiling pendant.
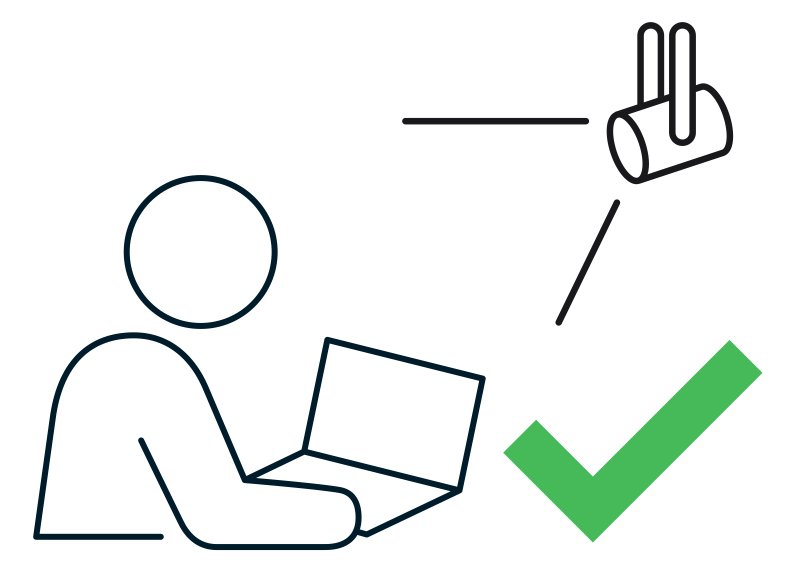
Ideally, any bright light source should be positioned behind and slightly above your camera for best results.
Even if the light seems aggressively bright to you, it should make for an even, clear image on your webcam. Even though most webcams have auto-balancing software features that attempt to produce the best results regardless of lighting, they can only do so much, and especially lower-end camera hardware like the webcam built into MacBooks will benefit greatly from some physical lighting position optimization.
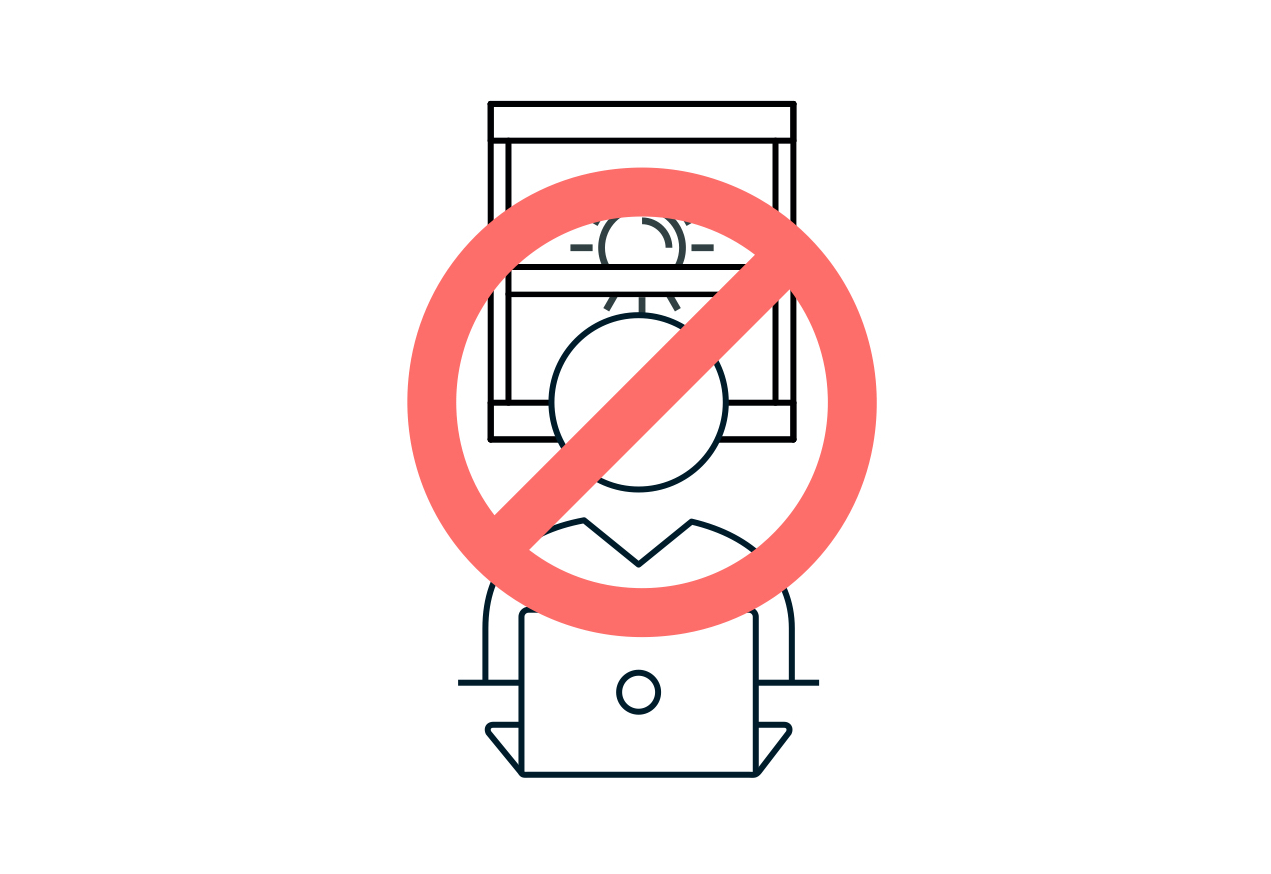
This is an example of what not to do: Having a bright light source behind you will make your face hard to see, and the background blown out.
Simple ways to level-up
The best way to step up beyond the basics is to learn some of the fundamentals of good video lighting. Again, this doesn’t necessarily require any purchases – it could be as simple as taking what you already have and using it in creative ways.
Beyond just the above advice about putting your strongest light source behind your camera pointed towards your face, you can get a little more sophisticated by adopting the principles of two- and three-point lighting. You don’t need special lights to make this work – you just need to use what you have available and place them for optimal effect.
- Two-point lighting
A very basic, but effective video lighting setup involves positioning not just one, but two lights pointed towards your face behind, or parallel with your camera. Instead of putting them directly in line with your face, however, for maximum effect you can place them to either side, and angle them in towards you.
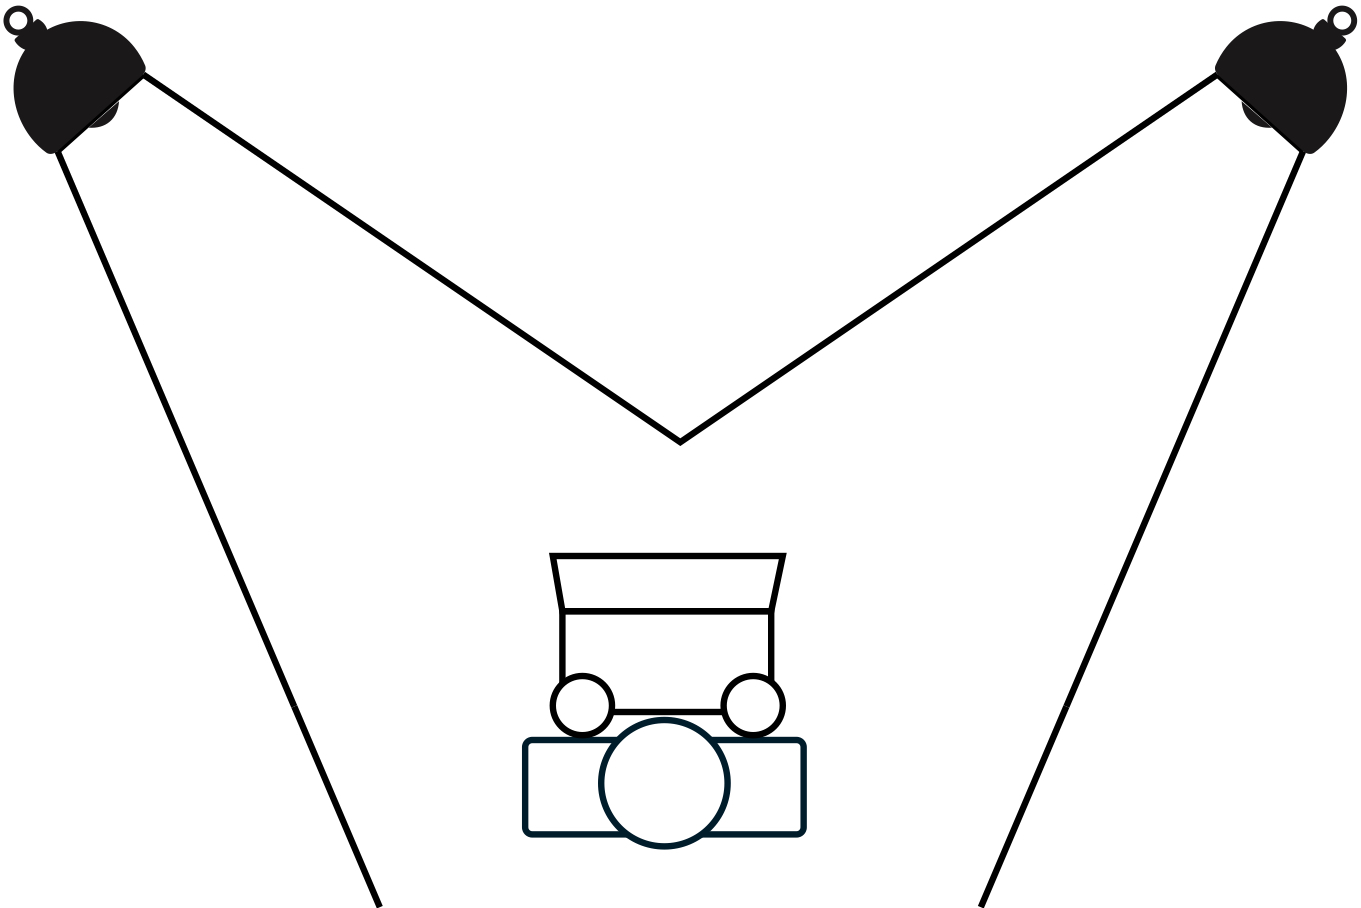
A simple representation of how to position lights for a proper two-point video lighting setup.
Note that if you can, it’s best to make one of these two lights brighter than the other. This will provide a subtle bit of shadow and depth to the lighting on your face, resulting in a more pleasing and professional look. As mentioned, it doesn’t really matter what kind of light you use, but it’s best to try to make sure that both are the same temperature (for ordinary household bulbs, how ‘soft,’ ‘bright’ or ‘warm’ they are) and if your lights are less powerful, try to position them closer in.
- Three-point lighting
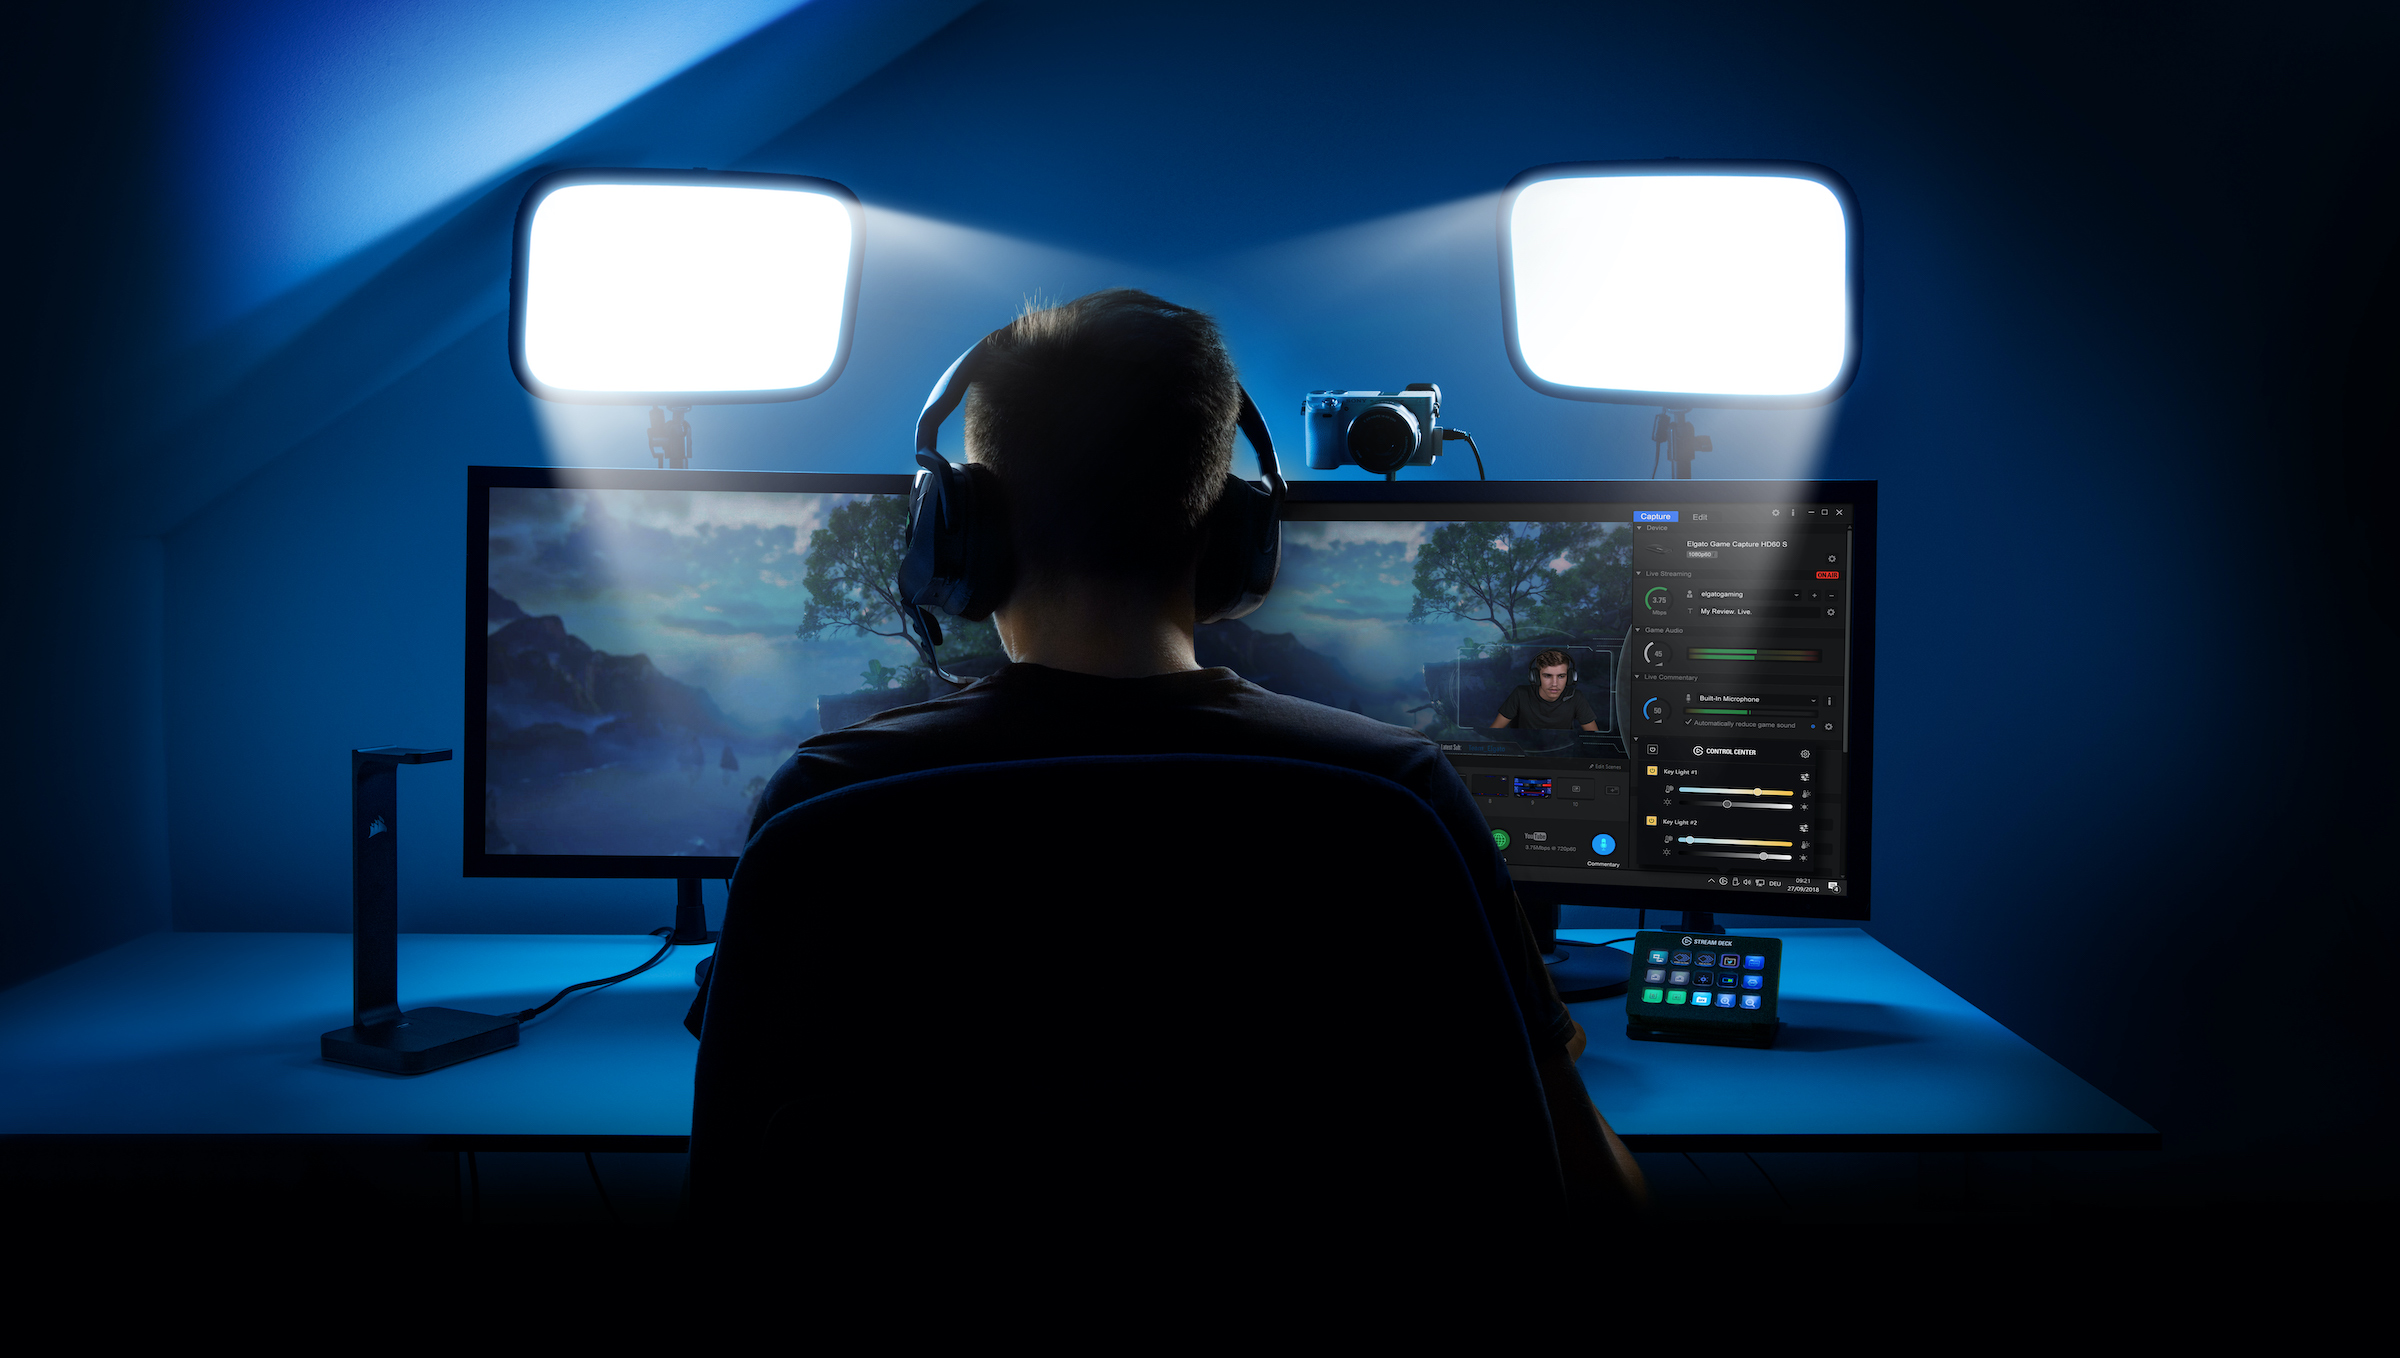
Similar to two-point lighting, but with a third light added positioned somewhere behind you. This extra light is used in broadcast interview lighting setups to provide a slight halo effect on the subject, which further helps separate you from the background, and provides a bit more depth and professional look. Ideally, you’d place this out of frame of your camera (you don’t want a big, bright light shining right into the lens) and off to the side, as indicated in the diagram below.
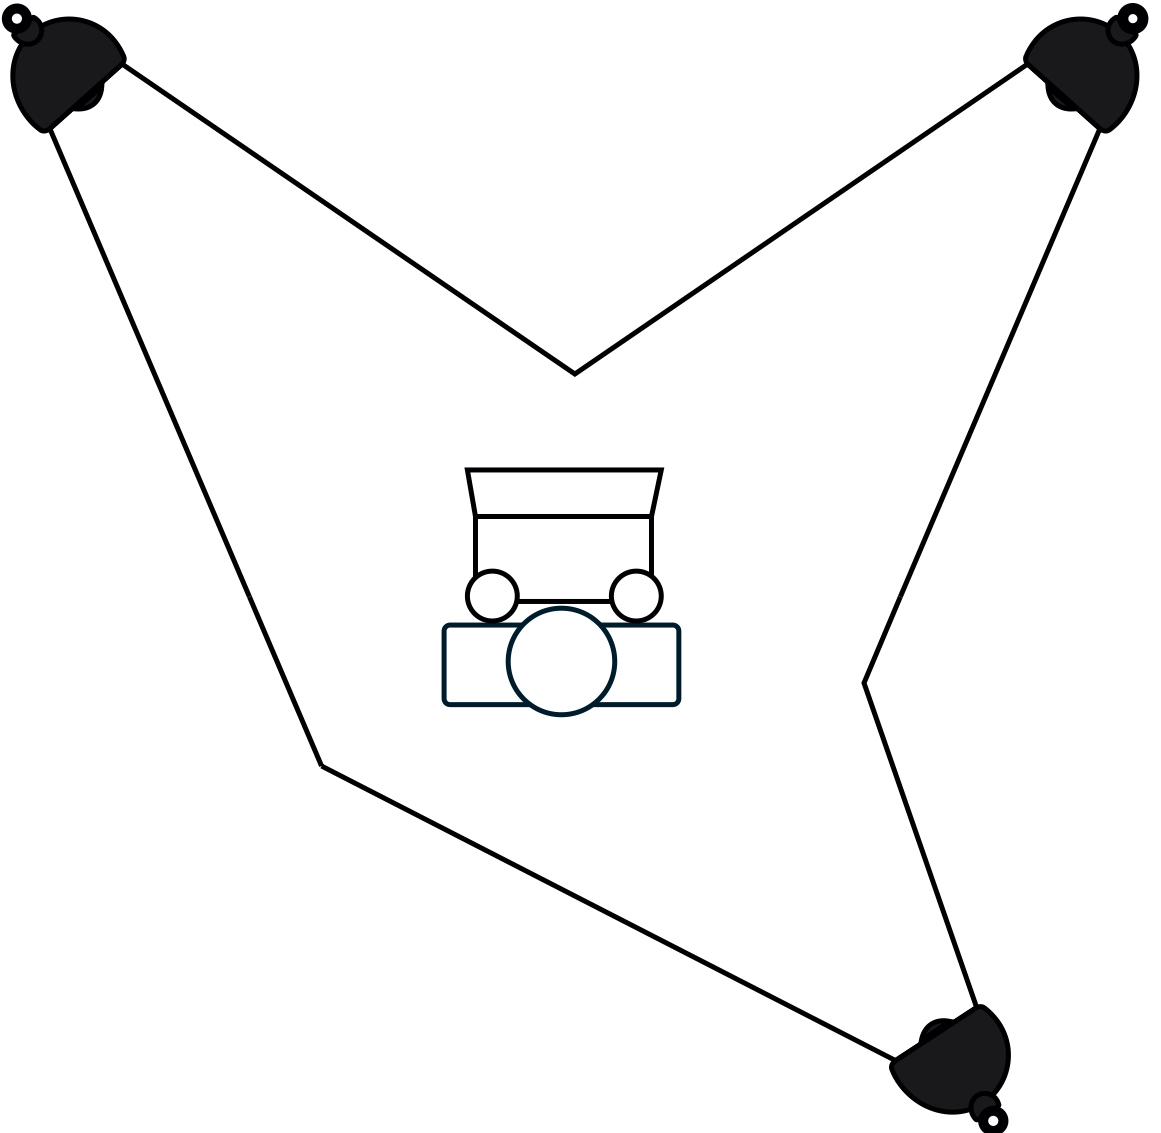
In a three-point lighting setup, you add a third light behind you to provide a bit more subject separation and pop.
If you’re looking to improve the flexibility of this kind of setup, a simple way to do that is by using light sources with Philips Hue bulbs. They can let you tune the temperature and brightness of your lights, together or individually, to get the most out of this kind of arrangement. Modern Hue bulbs might produce some weird flickering effects on your video depending on what framerate you’re using, but if you output your video at 30fps, that should address any problems there.
Go pro
All lights can be used to improve your video lighting setup, but dedicated video lights will provide the best results. If you really plan on doing a bunch of video calls, virtual talks and streaming, you should consider investing in some purpose-built hardware to get even better results.
At the entry level, there are plenty of offerings on Amazon that work well and offer good value for money, including full lighting kits like this one from Neewer that offers everything you need for a two-point lighting setup in one package. These might seem intimidating if you’re new to lighting, but they’re extremely easy to set up, and really only require that you learn a bit about light temperature (as measured in kelvins) and how that affects the image output on your video capture device.
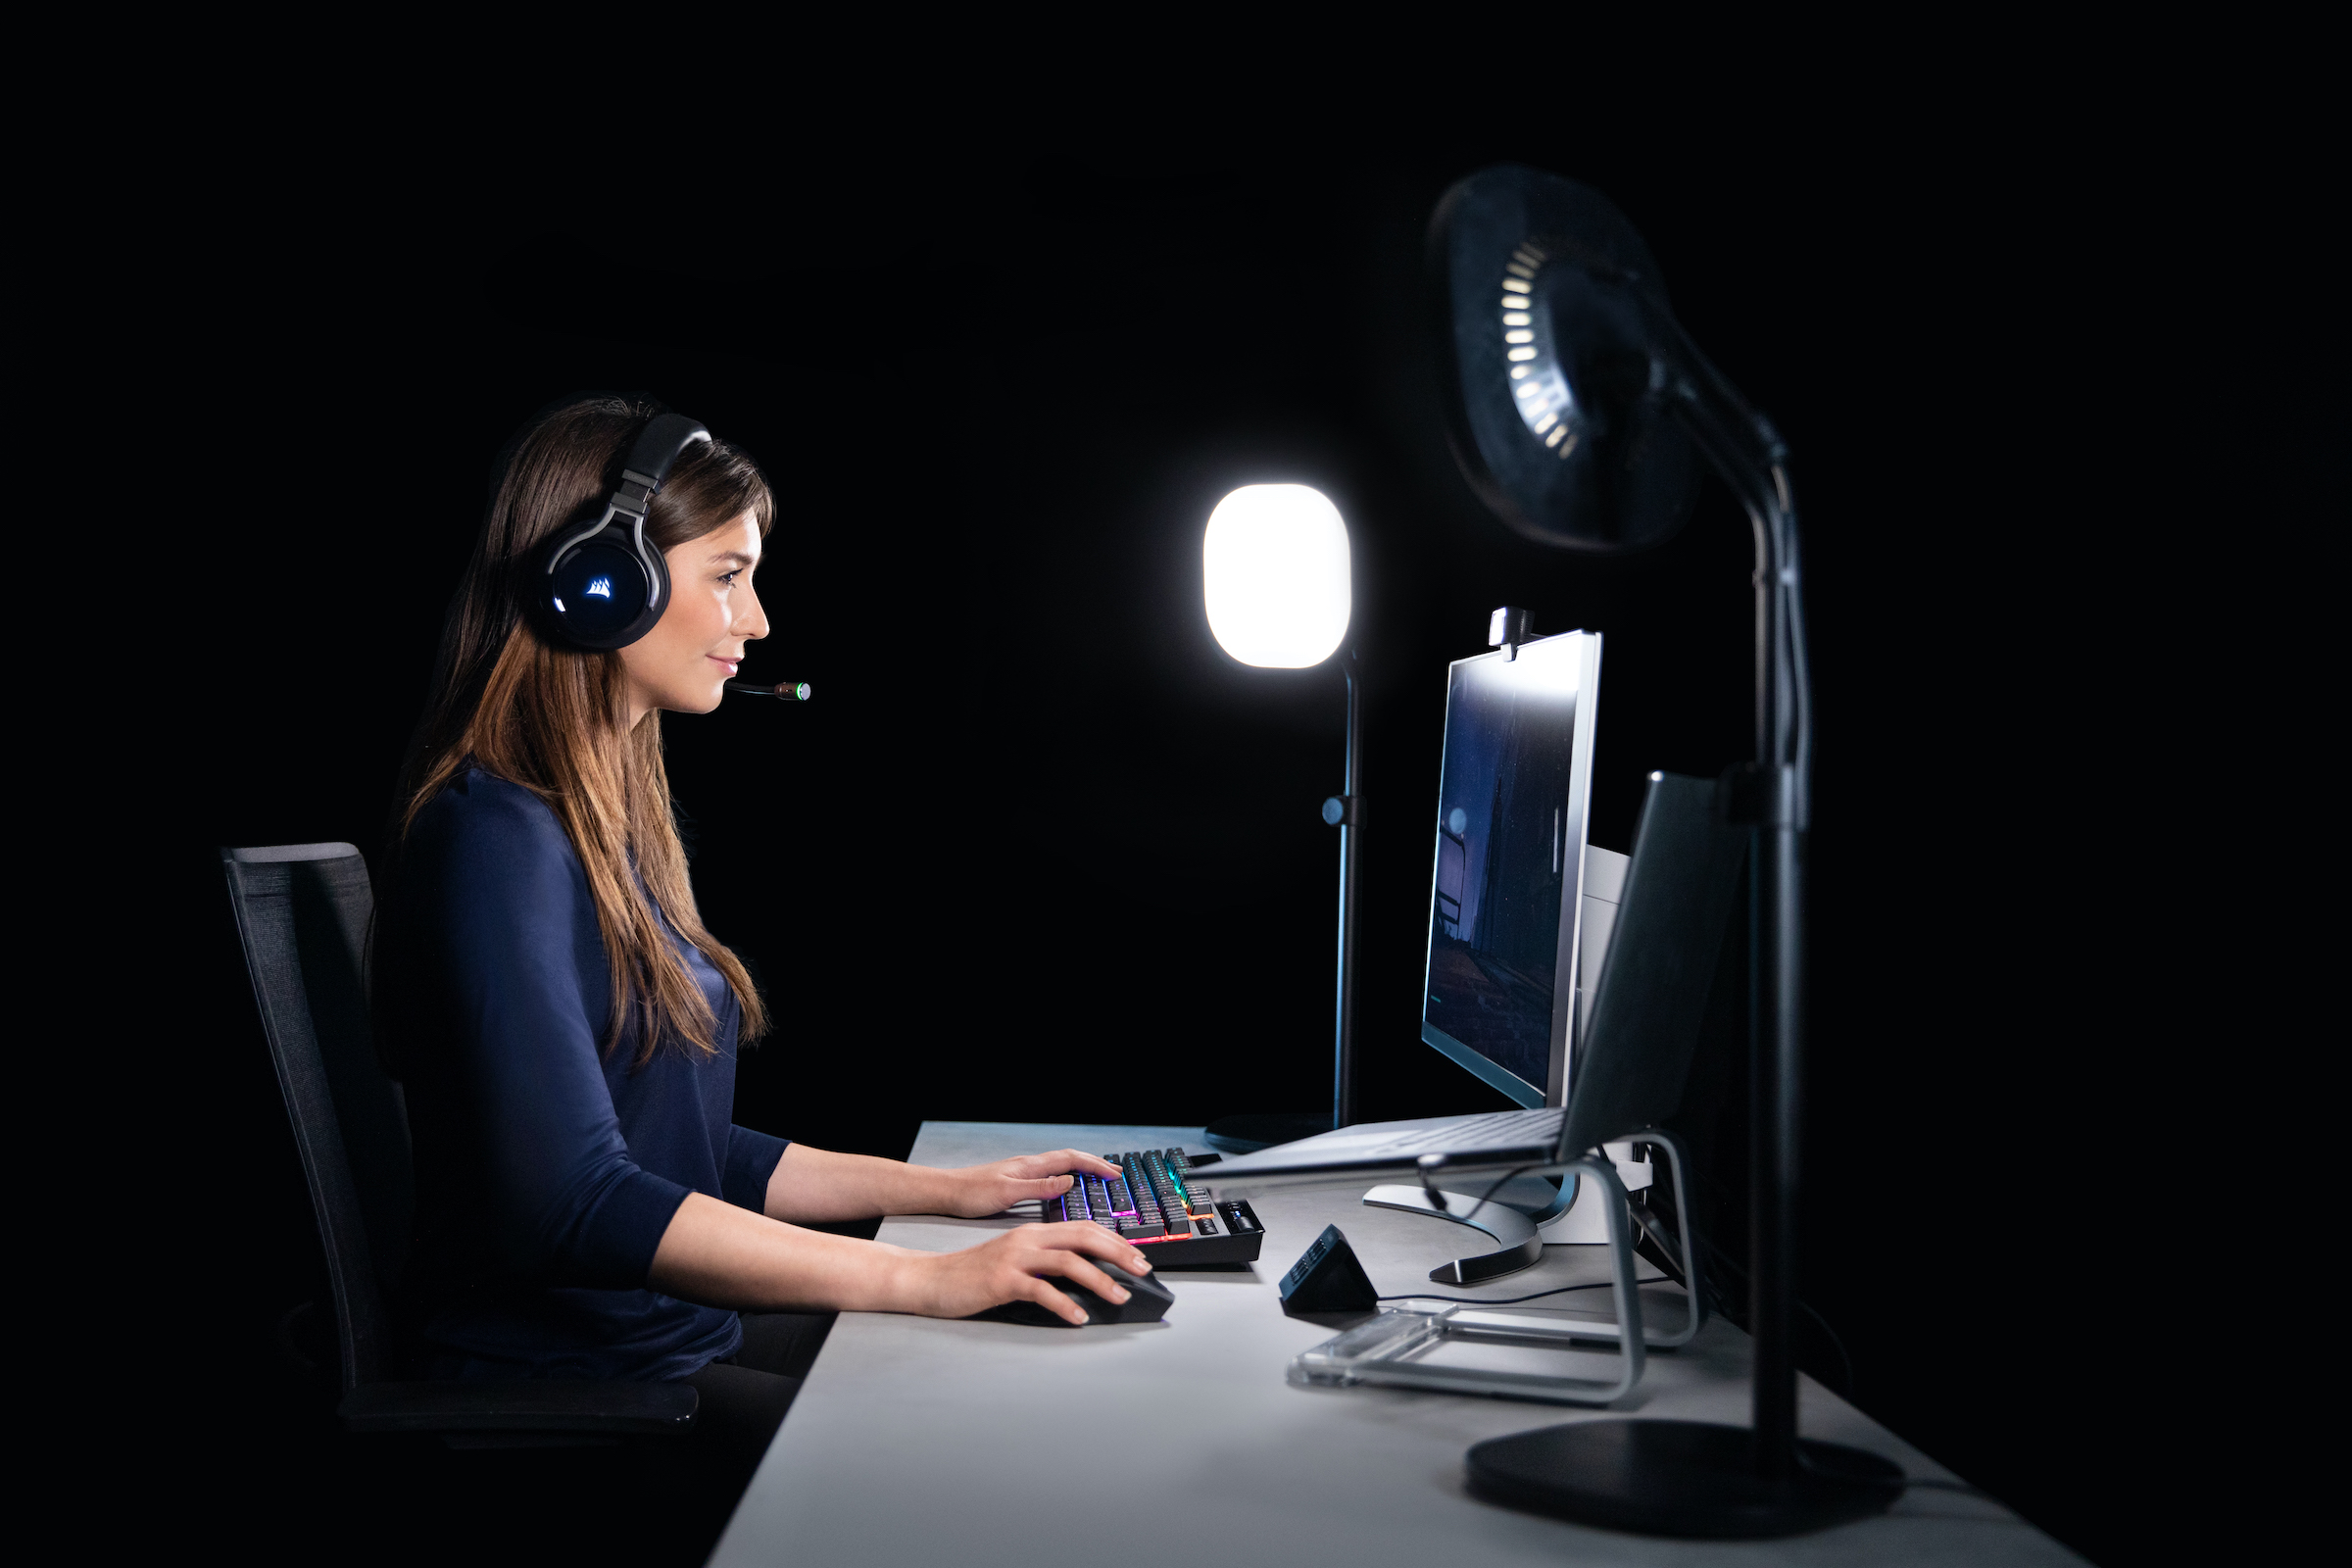
If you’re willing to invest a bit more money, you can get some better quality lights that include additional features including wifi connectivity and remote control. The best all-around video lights for home studio use that I’ve found are Elgato’s Key Lights. These come in two variants, Key Light and Key Light Air, which retail for $199.99 and $129.99 respectively. The Key Light is larger, offers brighter maximum output, and comes with a sturdier, heavy-duty clamp mount for attaching to tables and desks. The Key Light Air is smaller, more portable, puts out less light at max settings and comes with a tabletop stand with a weighted base.
Both versions of the Key Light offer light that you can tune form very warm white (2900K) to bright white (7000K) and connect to your wifi network for remote control, either from your computer or your mobile device. They easily work together with Elgato’s Stream Deck for hardware controls, too, and have highly adjustable brightness and plenty of mounting options – especially with extra accessories like the Multi-Mount extension kit.
With plenty of standard tripod mounts on each Key Light, high-quality durable construction and connected control features, these lights are the easiest to make work in whatever space you have available. The quality of the light they put out is also excellent, and they’re great for lighting pros and newbies alike since it’s very easy to tune them as needed to produce the effect you want.
Accent your space
Beyond subject lighting, you can look at different kinds of accent lighting to make your overall home studio more visually interesting or appealing. Again, there are a number of options here, but if you’re looking for something that also complements your home furnishings and won’t make your house look too much like a studio set, check out some of the more advanced versions of Hue’s connected lighting system.

The Hue Play light bar is a great accent light, for instance. You can pick up a two pack, which includes two of the full-color connected RGB lights. You’ll need a Hue hub for these to work, but you can also get a starter pack that includes two lights and the hub if you don’t have one yet. I like these because you can easily hide them behind cushions, chairs, or other furniture. They provide awesome uplight effects on light-colored walls, especially if you get rid of other ambient light (beyond your main video lights).
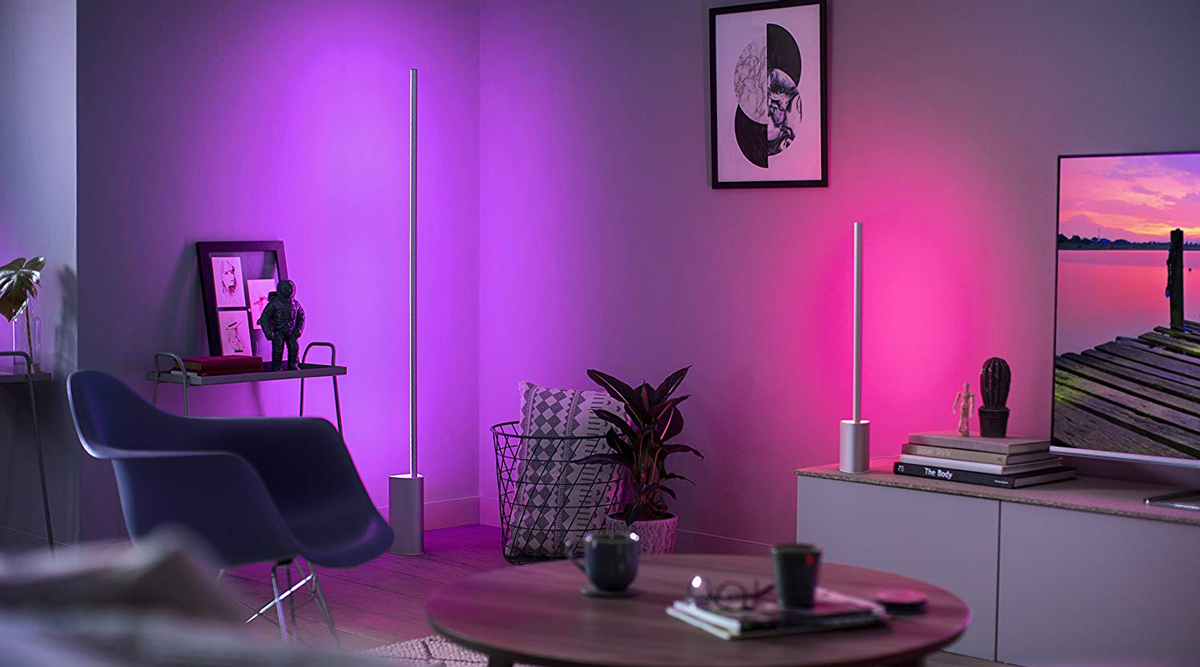
To really amplify the effect, consider pairing these up with something one the Philips Hue Signe floor or table lamps. The Signe series is a long LED light mounted to a weighted base that provide strong, even accent light with any color you choose. You can sync these with other Hue lights for a consistent look, or mix and max colors for different dynamic effects.
On video, this helps with subject/background separation, and just looks a lot more polished than a standard background, especially when paired with defocused effects when you’re using better quality cameras. As a side benefit, these lights can be synced to movie and video playback for when you’re consuming video, instead of producing it, for really cool home theater effects.
If you’re satisfied with your lighting setup but are still looking for other pointers, check out our original guide, as well as our deep dive on microphones for better audio quality.


Comments
Post a Comment